As a power tiller supplier, I’ve spent more than a decade walking workshops and farm fields with smallholder operators, hobby farmers, and professional agronomists. I’ve seen brand-new power tillers sit unused at the edge of a field because a seemingly minor ignition glitch left the operator stranded mid-preparation for planting season. I’ve also watched perfectly good tillers get written off prematurely because someone overcomplicated a simple check, or tried to tinker with the ignition system without knowing what they’re doing. That’s why I put together this step-by-step guide to checking your power tiller’s ignition system—this isn’t a textbook deep dive, it’s what I’ve learned by fixing hundreds of units, side by side with the people who actually use these machines day in and day out. Power Tillers

First, let’s ground this: the ignition system on a gas-powered power tiller works exactly like a small, compact car ignition, just smaller and built to handle dust, vibration, and occasional mud splatters. It’s made up of four core parts: the spark plug, the ignition coil, the wiring harness, and the flywheel’s ignition magnet. Each of these wears out or fails in predictable ways, and most checks you can do right in your workshop or even at the field edge with basic tools (I keep a basic tool roll in my service truck: a 5/8 inch spark plug socket, a pair of insulated pliers, a multimeter, a wire brush, and a small container for loose parts, that’s all). I always tell operators: if your tiller cranks but won’t start, or starts then dies within a minute, 9 times out of 10 the problem is in one of these four parts, not something major like the engine itself. That’s the first thing that takes the stress out of troubleshooting—you don’t need to take the whole machine apart.
Let’s start with the easiest check first, because it’s also the most common culprit: the spark plug. This is the part that creates the small spark that ignites the fuel-air mix in the combustion chamber, and it’s exposed to constant heat, oil, and carbon buildup, so it fails more often than any other ignition part. To check it, you don’t even need to disconnect the fuel line or drain the tank—this is a field-friendly check. First, turn the ignition switch to the “off” position, that’s non-negotiable, to avoid accidental sparks. Then, pull the rubber spark plug boot straight off the top of the plug; don’t twist it, that can damage the wire inside the boot. Next, use your spark plug socket to unscrew the plug from the cylinder head, turning it counterclockwise. Once it’s out, hold it carefully (the metal part is hot, even if the tiller was only run for a few minutes) and inspect it.
What are we looking for? First, the center electrode and the side electrode. If they’re covered in thick, black, sooty carbon, that’s a sign the engine is running too rich (too much fuel, not enough air) or the plug is old (most spark plugs need replacement every 100-150 hours of use, I remind everyone). If they’re coated in dry, powdery brown or white ash, that’s normal, that’s just small deposits from the fuel burning. If the electrodes look pitted, rounded, or have a crack in the porcelain insulator around the center, that means the plug has failed and needs replacing immediately—no amount of cleaning will fix that.
Next, test if the spark plug is actually producing spark. This is called a “spark test,” and it’s simple, but you have to do it safely. Reattach the spark plug boot to the plug you just pulled out, then ground the metal part of the plug to the metal part of the tiller’s engine block—you can do this by holding the metal shell of the plug with a pair of insulated pliers, and touching the metal part firmly to a bare, unpainted part of the engine (paint is an insulator, so that won’t work). Now, have a helper pull the starter cord firmly (or, if it’s an electric start model, press the start button) for 1-2 seconds. What should you see? A bright, blue, sharp spark jumping between the center and side electrodes. If the spark is yellow, orange, or weak and fizzly, that’s a bad sign—it means the plug is worn out, or the rest of the ignition system isn’t sending enough power to it. If there’s no spark at all, the problem is further up the line, at the ignition coil or the magnet.
Once you’ve ruled out a bad spark plug, the next step is checking the ignition coil. The ignition coil is the part that takes the low-voltage current from the battery (or, on some smaller power tillers, the magneto current from the flywheel) and steps it up to the thousands of volts needed to create that spark at the plug. This part fails most often because of vibration from the tiller’s engine, which can loosen connections or damage the internal windings. To test the ignition coil, you’ll need a multimeter, the kind that measures resistance (most basic multimeters do this, and I recommend every power tiller operator keep one in their tool kit). First, make sure the tiller’s ignition is off, then disconnect the two wires attached to the ignition coil—usually a positive wire, a negative wire, and sometimes a trigger wire. Set your multimeter to the ohms setting, which measures electrical resistance, and touch the two multimeter probes to the two terminals on the coil (check your coil’s manual for the correct terminals, but most are clearly marked). The resistance should fall within a specific range, usually between 3,000 and 15,000 ohms for primary resistance, and between 5,000 and 15,000 ohms for secondary resistance. If your reading is way higher or lower than that, the coil is bad and needs to be replaced. Also, while you’re at it, inspect the wiring for frays or broken insulation—even if the coil is good, a broken wire can cut power to the plug, and that’s a super easy fix.
The third part to check is the flywheel ignition magnet, which is what sends the current to the ignition coil on smaller, magneto-equipped power tillers (these are the ones without a battery, common on light-duty hobbyist models). The flywheel is the heavy metal wheel on the end of the crankshaft, and it has small, powerful magnets around its inner edge that pass close to the ignition coil as the engine spins. Over time, these magnets can lose their strength, or the gap between the flywheel magnet and the ignition coil can widen because of loose hardware or wear. To check the gap, you’ll need a thin piece of cardboard or a business card (or a feeler gauge, if you have one). First, remove the flywheel cover on the side of the engine, then pull the spark plug boot back and turn the flywheel by hand until the magnet is directly facing the ignition coil. The gap between the magnet and the coil should be between 0.010 and 0.020 inches—thin enough that the business card fits snugly between them, but not so tight that it gets pinched when you turn the flywheel. If the gap is wider than that, you can usually adjust it by loosening the coil mounting screws and gently moving the coil closer to the flywheel. If the gap is correct but you still have no spark, that means the magnet has lost its charge, and the flywheel assembly will need to be replaced.
Wait, I should mention a common mistake I see all the time: people ignore the wiring connections between the ignition switch and the rest of the system. The ignition switch itself can go bad, especially if it’s exposed to rain or mud, which can cause corrosion on the internal contacts. A quick check here: if your tiller has an electric start, you can use your multimeter to test the continuity of the ignition switch when it’s turned to the “on” position. If the switch isn’t passing current when it should, that’s an easy replacement, no need to tear into the ignition coil or flywheel.
I also want to add a few pro tips from years in the field that I don’t see in most service manuals. First, always clean the spark plug gap before you test it—sometimes a little carbon buildup on the gap is all that’s causing a weak spark. You can use a small file or the edge of a wire brush to gently adjust the gap to the manufacturer’s specification, usually between 0.020 and 0.025 inches. But if the plug is older than 150 hours, just replace it—they’re cheap, and a new plug will save you the headache of troubleshooting a worn part. Second, when you reattach the spark plug boot, make sure it’s pushed all the way on—if it’s only half on, that will create a bad connection and a weak spark, no matter what else is working. Third, if you’re working in muddy or dusty conditions, remove the spark plug every month to clean it and check for deposits—dust and oil can get into the cylinder and cause buildup faster than you’d think, especially if you till in dry, loose soil.
Now, let’s talk about when to replace parts, not just fix them. I always tell operators that if your ignition coil is over 5 years old, even if the resistance test comes back good, it’s worth replacing as a preventative measure—vibration will slowly degrade the internal windings, and you don’t want to get stuck in the middle of planting season waiting for a new coil. The flywheel magnet, too, if your light-duty tiller is over 8 years old, it’s a good idea to check the magnet strength; you can do this with a small compass, hold the compass near the flywheel while you turn it, and if the compass doesn’t deflect, the magnet is dead and needs to be replaced.
A common scenario I run into every spring: a farmer brings their power tiller to me in April, saying it wouldn’t start. They did the spark plug check, thought the plug was fine, replaced it, and it still wouldn’t start. Then we test the coil, and the resistance is way too high—turns out they’d been using it for three years without checking the wiring, and a frayed wire from the tiller’s handle to the coil had gotten pinched between the frame and the engine, breaking the internal wire. That’s a $5 fix, not a $200 coil replacement, but only because we checked the wiring first.
At the end of the day, checking the ignition system of a power tiller is about routine, not complex mechanical work. It takes 10 minutes when you’re getting the machine ready for the season, and another 5 minutes every time you finish a big tilling job. That small time investment can save you hours of frustration and even save your crop if you get delayed by a broken tiller.
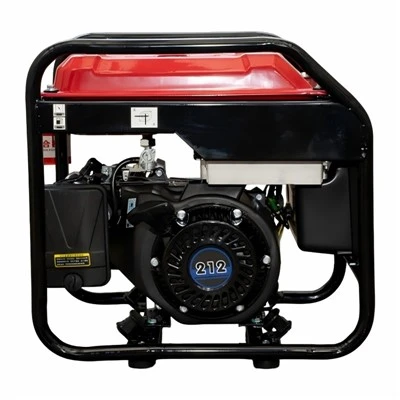
If you’re noticing consistent ignition issues with your power tiller, or you need genuine replacement parts to get your machine running at peak performance, don’t hesitate to reach out to our team. We carry all the original equipment ignition parts for every make and model of power tiller, and we’re always happy to walk you through additional troubleshooting or installation tips, no matter your level of mechanical experience. We work with smallholder farms, hobby operators, and commercial ag businesses, so we understand how critical reliable equipment is to your work.
Mini Excavators References:
Small Engine Repair and Maintenance: A Practical Guide. Delmar Cengage Learning, 2020.
Power Tiller Operator’s Manual Standards. American Society of Agricultural and Biological Engineers, 2019.
Yantai Xinwang Agricultural Machinery Co., Ltd.
With abundant experience, we are one of the most professional power tillers manufacturers and suppliers in China. We warmly welcome you to buy durable power tillers for sale here from our factory. If you have any enquiry about customized service, please feel free to email us.
Address: East of Lijiatuan Village, Huili Town, Fushan District, Yantai City, Shandong Province, P.R.China
E-mail: 2509158104@qq.com
WebSite: https://www.xinwangagri.com/
